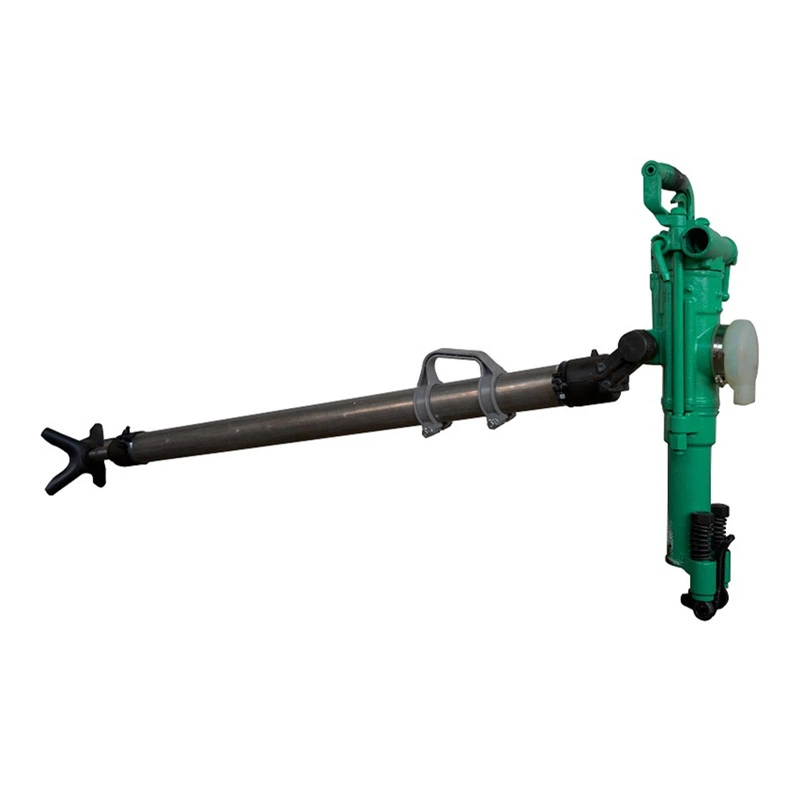
Connecting the drill rod of a Pusher Leg Rock Drill is a crucial process that requires precision and knowledge. As a reputable supplier of Pusher Leg Rock Drills, I understand the importance of this step in ensuring efficient and effective drilling operations. In this blog, I will guide you through the process of connecting the drill rod, highlighting key points and best practices.

Understanding the Pusher Leg Rock Drill
Before delving into the drill rod connection process, it's essential to have a basic understanding of the Pusher Leg Rock Drill. This type of drill is commonly used in mining, construction, and tunneling applications. It is designed to be operated with a pusher leg, which provides the necessary thrust and support during drilling. The drill rod is a vital component that transfers the rotational and percussive forces from the drill to the rock face.
Pre - connection Preparations
- Inspect the Drill Rods:
- Examine each drill rod for any signs of damage, such as cracks, bends, or worn threads. Damaged drill rods can lead to poor drilling performance and may even pose a safety hazard. If any damage is detected, replace the drill rod immediately.
- Clean the drill rod threads thoroughly. Use a wire brush or a suitable cleaning agent to remove dirt, debris, and rust. This ensures a proper connection and prevents cross - threading.
- Check the Drill Machine:
- Ensure that the Pusher Leg Rock Drill is in good working condition. Check the air supply, lubrication system, and all moving parts. A malfunctioning drill can cause problems during the connection process and subsequent drilling operations.
- Make sure the chuck or coupling on the drill machine is clean and undamaged. The chuck is responsible for holding the drill rod securely in place.
Connecting the Drill Rod
- Select the Right Drill Rod:
- Choose a drill rod that is compatible with your Pusher Leg Rock Drill. Consider factors such as the diameter, length, and thread type. Using an incompatible drill rod can lead to poor performance and may damage the drill machine.
- Initial Alignment:
- Hold the drill rod in a vertical position and align it with the chuck or coupling on the drill machine. Make sure the threads on the drill rod and the chuck are properly aligned. This may require some careful positioning and adjustment.
- Start the Threading Process:
- Begin threading the drill rod into the chuck by hand. Turn the drill rod clockwise gently. This initial hand - tightening helps to ensure that the threads start correctly and prevents cross - threading. Do not force the drill rod if it does not turn easily; instead, re - check the alignment.
- Use a Wrench for Tightening:
- Once the drill rod is hand - tightened, use an appropriate wrench to further tighten it. Apply the correct amount of torque as specified by the drill rod and drill machine manufacturers. Over - tightening can damage the threads, while under - tightening can cause the drill rod to come loose during drilling.
- Inspect the Connection:
- After tightening, visually inspect the connection to ensure that it is secure. There should be no visible gaps or misalignments between the drill rod and the chuck. You can also give the drill rod a gentle tug to check for any looseness.
Additional Considerations for Multiple Drill Rods
In many drilling operations, multiple drill rods need to be connected to achieve the desired drilling depth. Here are some tips for connecting multiple drill rods:
- Sequential Connection:
- Connect the drill rods one by one in a sequential manner. Start with the drill rod closest to the drill machine and gradually add more rods as needed.
- Thread Protection:
- When connecting multiple drill rods, be careful not to damage the threads. Use thread protectors if available to prevent dirt and debris from entering the threads during the connection process.
- Alignment and Tightening:
- Ensure that each drill rod connection is properly aligned and tightened. The alignment is crucial to maintain a straight drilling path, and proper tightening prevents the rods from coming loose.
Safety Precautions
- Wear Protective Gear:
- Always wear appropriate personal protective equipment (PPE), such as safety glasses, gloves, and hard hats, when connecting drill rods. This protects you from potential hazards such as flying debris and sharp edges.
- Follow Manufacturer's Instructions:
- Adhere to the manufacturer's instructions for both the drill machine and the drill rods. These instructions provide important safety guidelines and recommended procedures.
- Avoid Over - Exertion:
- When using a wrench to tighten the drill rod, do not over - exert yourself. Use proper body mechanics and leverage to avoid injury.
Related Products
If you are interested in other types of drilling rigs, we also offer a range of high - quality products. Check out our Pneumatic Drill Rig, Dth Rock Drilling Rig, and Compact Rock Drill Rigs. These rigs are designed to meet different drilling requirements and offer excellent performance and reliability.
Contact for Purchase and Consultation
We understand that choosing the right drill rods and equipment is essential for your drilling operations. If you have any questions about connecting drill rods, or if you are interested in purchasing our Pusher Leg Rock Drills or other drilling products, please feel free to contact us. Our team of experts is ready to assist you with your inquiries and provide you with the best solutions for your needs.
References
- Manufacturer's manuals for Pusher Leg Rock Drills and drill rods.
- Industry standards and guidelines for drilling operations.